
The Inspiration
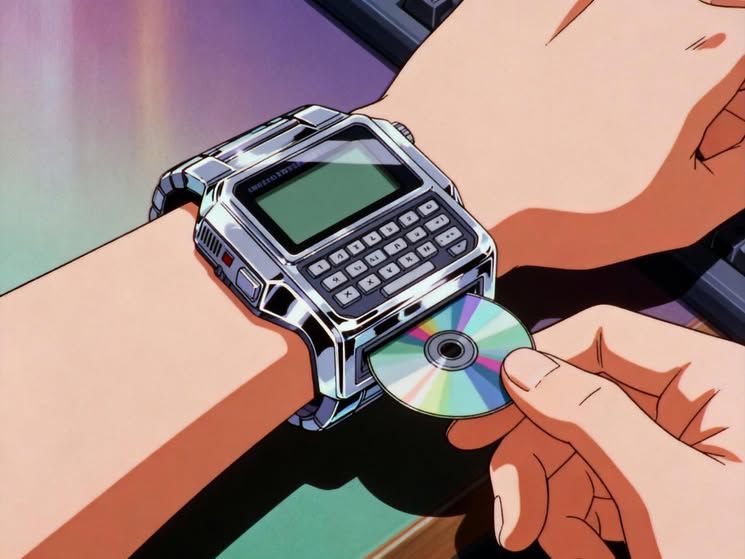
I found this artist on Reddit, Alex_DiP, who manually paints subpixels which gives a very cool effect. From afar, the image looks like it is in color, but from close by, you can see that the painting is actually made only of red, green, blue (and black).
Video: Alex_DiP subpixel painting demo View on Reddit
I've always liked learning about image processing at a fairly low level, so I set out to create my own image processing pipeline.
Why This Visual Style Works
The reason for the existence of this visual style in the first place is fairly interesting. Our eyes can only detect 3 colors—red, green, and blue—due to our cone receptors in our eyeballs.

Image: Human eye cone receptors diagram Source
For all the values in between, if the eye cannot perceive them as discrete (for example, if there are a lot of very red and green dots next to each other), then the brain fills in the gap and interpolates the values of the two colors to guess the one in the middle.
This allows us to do a very cool trick when showing images on screen: instead of worrying about having LEDs for all the frequencies of visible light, we can just have red, green, and blue lights. If they are far enough apart or small enough, we can trick our brain into seeing colors that are not there.
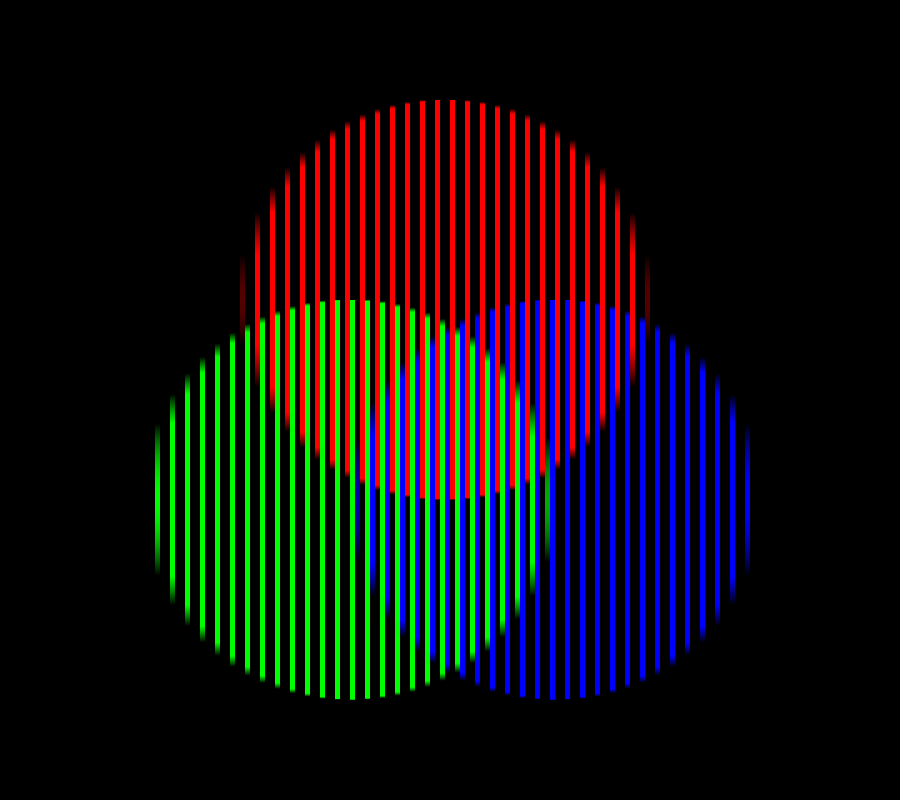
Image: RGB color illusion Source
CRT Displays and Their Artifacts
For the very first commercially available consumer displays, this meant that each "pixel" had discrete subpixels that were red, green, and blue. At low resolutions, this is what gives the distinct look of old CRT (cathode ray tube) displays that we associate with retro games, old-timey videos, and that we can see in the work of Alex_DiP.
Of course, there are a lot of other factors that contribute to this effect:
- Low resolution (typically 480 pixels high)
- Interlaced/progressive rendering
- Bloom
- And more...
I'll be going into a bit more detail on each of the artifacts that I implemented in the shader, but you can check this video for a more in-depth explanation of these limitations/artifacts and where/why they exist:
Why Retro Games Look Better on CRT
For a lot of older games, enthusiasts will rely on shaders or actual CRT displays, as the games were intended to be played on such displays and were designed using tricks that made use of those "limitations." As a result, many older games look better on these older displays.

Image: CRT vs LCD comparison Source
Implementation
My very first goal was to achieve the separation of RGB "color" pixels into their separate components/subpixels.
Splitting the Pixels: The Naive Approach
My first instinct was to do what I had learned in my college class on multimedia processing: simply iterate over the values, get the R, G, and B components, and push those values to a new image that would contain separate pixels for each of the original pixels.
I set on having the output be 3 times the input. This way I could keep the aspect ratio of the input and have equal proportions of each of the colors. A simple pixel would be split into a 3×3 grid with each of the columns representing the red, green, and blue channels.
Illustration: Pixel to 3×3 subpixel grid transformation (generated with nano banana pro)
This is fairly trivial to do since we store color in RGB values already, so it was a matter of accessing the raw data of a pixel and adding a bunch of zeros.
The main issue with this approach is that it is slow—everything is processed through the browser and thus the CPU. This is not fundamentally a problem for images, but for video it would be, and I wanted to do things "properly."
Smarter: Shaders
I had some experience coding games in Unity, so I knew a bit about shaders—mostly in concept, as I had not implemented any on my own. Fundamentally, shaders are image processing programs that take advantage of the GPU to render games faster.
Instead of processing the image pixel by pixel, you "batch" the processing. For example, you process pixels 8 by 8 and send the calculation to 8 different processing units in order to parallelize the processing.
This is great but involves dealing with a lot of new issues: memory access is not the same, so we need to transfer data manually between CPU memory and GPU memory. Browser support for GPU workloads is disparate and complex.
The technologies you can use for this task vary a lot (Vulkan, Metal, WebGL) depending on the browser.

Chart: WebGPU browser compatibility View on caniuse.com
You can learn more about graphics APIs here.
The thing is, I really don't want to learn 3 different technologies and wrestle with decade-old languages/libraries in order to ensure compatibility with every browser/OS. But as I am lucky to live in a society where people much smarter than me spend good time and money building tools so that I don't have to worry about all this, the recent WebGPU project comes to the rescue.
WebGPU is a unified package that sits on top of all the platform-specific implementations and aims to be the future solution for browser-based graphics and GPU compute. One caveat: it is not compatible with everything yet and is still very much unstable (check compatibility).
Now that's sad and all, but I'm just here to learn some new stuff and I don't mind a little bit of instability. Also, the WebGPU project has some pretty good backers, so I'm not too concerned.
TypeGPU
Another thing I found is TypeGPU, a typed implementation of all that good WebGPU stuff. I like typed stuff since it reduces the learning curve in my opinion, but I think the library is too young to be used efficiently for big projects yet. I'll go into a bit more detail in the Camera Support section.
Lower Resolution (Sampling)
CRT works by rendering pixels from left to right, top to bottom, one pixel at a time.
GIF: Slow-motion CRT rendering Source
The resolution is the number of lines rendered. Most CRTs that people were familiar with are 480 lines tall. This means that most displays we are used to today are much higher resolution—1920×1080 (Full HD).
Processing the image through the shader leads to us having truly massive images on the output, and the look of the CRT display is not very visible as pixel art was designed for those 480p displays.
In order to achieve this "compression," I added a "sampling" setting. The sampling setting "reduces" the amount of pixels by the square of that multiplier. For example, a sampling rate of 3 means that each 3×3 block of pixels will be reduced to 1 pixel before being passed to the RGB part of the pipeline.
This is achieved by using the value of the "center" pixel as the value of that entire block. There might be other ways to do it (averaging the color over the entire block, picking the darkest/lightest color for better conservation of edges), but this solution is the least costly in terms of computation since I only need to access the value of one pixel from memory.

Example: Pixelation effect at different sampling rates Source
Note that because of the compression, especially at low resolutions, high-resolution images tend to become less legible, thus highlighting the role of pixel art artists that make design choices in order to maintain legibility at the cost of realism.
Original pixel art
High-res illustration

Downsampled illustration
Comparison: Intentional pixel art vs. downsampled realistic image. This demonstrates how downsampling cannot replace pixel artists and what detail and legibility is lost in the process.
Interlacing
Another well-known artifact from CRT displays is scan lines. Those are often associated with the previously mentioned left-to-right rendering of pixels, but in actuality, the visible scan lines are due to interlacing.
Because of data transfer speed limitations, images were broadcast in halves—the even rows and the odd rows alternating.

Illustration: Interlaced vs. progressive rendering Source
At high enough speeds, the frames blend together because of image persistence and we get a full image, but it also helps smooth some animations at the cost of a flicker.
Now this "works," but I find the effect frankly distracting—maybe something due to the refresh rate of my display being too low? (CRTs were 60fps.)
Note: Without interlacing, the format is called progressive, when all rows are rendered on each frame. This is where the "p" (progressive) and "i" (interlaced) comes from in YouTube video resolutions (e.g., 1080p, 1080i)—not from "pixels" as most people might think!
Camera Support
Now that the shader works, I had to make it compatible with cameras. This sadly meant that I kind of had to reduce a lot of the advantages of TypeGPU.
TypeGPU does not expose all the functions that WebGPU does. Namely, copyExternalImageToTexture() does not exist in TypeGPU. The function I had been using, texture.write(imageBitmap), worked fine for static images but could not work with the camera pipeline. I had to switch to using WebGPU's GPUQueue.copyExternalImageToTexture() directly, which required accessing the underlying WebGPU objects.
This is at the moment the biggest limitation to TypeGPU I could see. You can get around it by accessing the underlying WebGPU objects, but that kind of defeats the point of TypeGPU. This is the main reason why I think one should be very careful in using TypeGPU for large-scale products.
That being said, it does not lead to anything being impossible, and I simply rewrote most of the pipeline with inspiration from this example project (check out the other demos—they are very cool!).
Export to Image
Finally, I added a function to export the video or image to a PNG for download. This uses two different but similar pipelines for images and videos at the moment, because the data of the image is not retained after rendering.
I need to reprocess the image before re-rendering, while I can just add a flag to the video rendering process to export a single frame.
Clean Code Architecture
Now this is a bit overkill as the library is quite small and could honestly be a single file, but I've been wanting to practice better/cleaner coding standards. That's why I reformatted it following the Clean Architecture structure.
Usage
Install the package from GitHub:
pnpm add github:SollalF/crt-subpixelThen use it in your project:
import { CrtSubpixelProcessor } from 'crt-subpixel';

const processor = new CrtSubpixelProcessor();
await processor.init();

// Process an image
const bitmap = await createImageBitmap(imageFile);
await processor.renderImage(canvas, bitmap);

// Or use camera mode
await processor.startCamera(canvas);
Conclusion
All in all, the project was very interesting and allowed me to dive deeper into GPU/CPU memory concepts, CRT technologies, clean architecture, graphical concepts, and familiarize myself with new libraries that will be the foundational stone of a lot of browser functionality.
You can imagine browser-based local LLMs (like WebGPT) and full games running in the browser with minimal installation requirements.
Future Improvements
There are still a few aspects that I would like to improve in the future:
Bloom
Subpixel colors tend to bleed a bit into each other on CRT displays. This effectively functions as anti-aliasing and helps render smooth gradients when using dithering.
Video Processing
I would like to be able to upload and process videos and re-output them as videos.
Ghosting/Smudging
I'm unsure by how much, but the phosphor that covers CRT screens retains luminosity for a few milliseconds (phosphor persistence) after being activated. This leads to a bit of smudging which I think could help with the flickering look of interlaced video.
Inter-Pixel Space
Due to manufacturing limitations, older CRTs had visible black space between pixels that were smaller than the pixels themselves. I'm wondering if that might help make "scan lines" more visible or give a more authentic feel even to the progressive rendered images.
Other Filters
There are a couple of other effects that I think might improve the feel, despite not being CRT-specific artifacts but most commonly due to data transfer/camera limitations:
- Noise
- Chromatic aberration
- Lens distortion (technically to replicate the curved look of a CRT display)